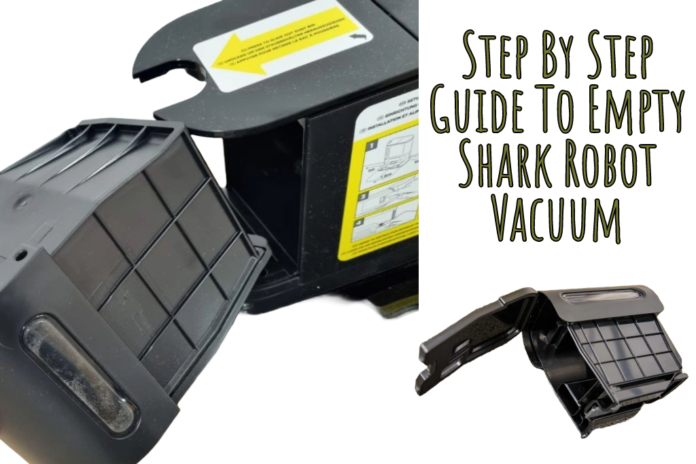
In today’s fast-paced world, robotic vacuums like the Shark Robot Vacuum have become essential tools for maintaining a clean and comfortable home environment. While these devices offer remarkable convenience and efficiency, their performance hinges on regular maintenance, the cornerstone of which is the routine emptying of the dustbin. In this comprehensive guide, we will delve into a detailed, step-by-step process to Empty Shark Robot Vacuum, ensuring it continues to operate at peak efficiency. From understanding the nuances of different models to practical maintenance tips, this article covers everything you need to keep your robotic companion functioning flawlessly.
Table of Contents
Understanding Your Shark Robot Vacuum
Before embarking on the emptying process, it’s important to understand the nuances of your Shark Robot Vacuum. Each model has its unique design elements and features, but they all operate on the same basic principle: navigate around your home and suck up dirt and debris into an onboard dustbin. This dustbin, typically located within the main body of the vacuum, is the primary focus of our maintenance efforts. The capacity, accessibility, and design of the dustbin can vary between models, so it’s crucial to refer to your specific model’s manual for tailored instructions.
Also read: How To Reconnect Shark Robot To Wifi?
Preparing to Empty the Vacuum
Safety and preparation are key. Start by ensuring that the vacuum is turned off and is not sitting on its charging dock. This prevents any unexpected startup during the cleaning process. It’s also wise to perform this task in an area where accidental spillage can be easily cleaned, such as over a trash can or on a hard floor. Gathering your tools beforehand – typically a garbage bag for disposal and a small cleaning brush – will make the process smoother.
Also read: Shark Robot Vacuum Parts And Their Functions
Step-by-Step Guide to Emptying the Vacuum
1. Locating the Dustbin:
The dustbin is usually located at the back or bottom of the vacuum. Identifying the correct latch or button that releases the dustbin is crucial and can vary between models.
2. Removing the Dustbin:
Carefully press the release button or latch and gently extract the dustbin. It’s important to do this carefully to avoid any spillage of its contents.
3. Emptying the Dustbin:
Holding the dustbin over a trash can, open its lid. Most Shark models feature a simple mechanism where a button is pressed or a lever pulled to open the lid and release the contents. Ensure that all debris is emptied out.
Also read: How To Reset Shark Robot Vacuum?
4. Cleaning the Dustbin:
After emptying, it’s essential to clean the dustbin thoroughly. Gently tapping the dustbin can help dislodge any clinging dust. Use the provided cleaning brush to sweep away any lingering particles. Ensure that all corners and crevices are debris-free.
5. Inspecting and Cleaning the Filters:
Within the dustbin, you’ll often find filters that need regular cleaning. Remove the filter and tap it gently to remove loose dust. If your model has washable filters, rinse them under cold water and allow them to air dry completely. Never reinstall a damp filter as it can damage the vacuum.
Also read: All About Shark Robot Vacuum
6. Reassembling the Vacuum:
After ensuring the dustbin and filter are clean and dry, reassemble the vacuum. Ensure the filter is correctly positioned and the dustbin clicks back into place securely. This ensures no loss of suction or debris leakage during operation.
7. Troubleshooting Common Issues:
Occasionally, you might encounter issues such as stuck debris in the dustbin or a filter that seems overly dirty. Consult your model’s manual for specific troubleshooting advice. Avoid using sharp objects to remove debris as they can harm the vacuum’s components.
Also read: Top Solutions If Shark Robot Vacuum Not Charging
Maintenance Tips
A well-maintained Shark Robot Vacuum not only performs better but also lasts longer. Here are additional maintenance tips:
– Regularly inspect and clean the vacuum’s brushes and wheels to prevent clogging.
– Keep the sensors clean with a soft, dry cloth to ensure effective navigation.
– Establish a regular schedule for emptying the vacuum, based on how frequently it’s used.
Also read: How to Reset Your Shark Robot Vacuum for Optimal Functioning
Conclusion
Maintaining your Shark Robot Vacuum through regular emptying and cleaning is more than just a chore; it’s an investment in the longevity and efficiency of your device. By following the detailed steps outlined in this guide, you can ensure that your vacuum remains a reliable and effective tool in your cleaning arsenal. Regular maintenance not only enhances the vacuum’s performance but also extends its lifespan, making it an indispensable part of your home cleaning routine. Remember, the secret to a perpetually clean home lies not just in the technology you use, but in how well you take care of it.

